First: I start with a clean naked face.
 |
| The "before" picture. No edits here. |
Next I use a bronzer to accentuate my cheekbones. I like to create the illusion of a shadow. I use a large brush to apply the bronzer just beneath my natural cheekbones to make them appear to sink in deeper.
 |
| Basically any bronzer will work. Notice how it is beneath my actual cheekbone to create a sculpted look. |
After I apply the powder I do two things that I went for years without doing, and I honestly don't know how!
First: my eyebrows. I have a wonderful eyebrow kit from Benefit that cost about $30. If you aren't ready to spend that much on your precious brows just yet, you can achieve a similar look using an eyebrow pencil in combination with some dark brown shadow. (pencil first, then shadow) But please, I beg you, do your eyebrows! Nothing looks worse than great makeup with ugly brows.
 |
| My eyebrow kit. The left is wax which I use first with the angled brush. Then I use the powder on the right. |
 |
| This is how much much better my eyebrows look after filling them in. I can't stand the sight of them otherwise! |
 |
| I use MAC's Paint Pot in Soft Ochre as a base. It's $18.50 but worth it. I've had mine for more than 2 years now and I use it daily! |
 |
| With white shadow to highlight. I use Maybelline "Shimmer" |
After I adding the nude to the lower brow bone and the lowest part of my lid I add a more shiny champagne color to the inner corner of my eye and up towards the brow to about 1/4 of the way across my lid. I do this to accentuate the shape of my eye and to blend with the dark colors. Any lighter color will do, and I experiment with using color on this particular part of the eye a lot. For this look I used CoverGirl's #750 Mink.
 |
| These are well loved. I use them every day! On the right is Covergirl #750 Mink |
 |
| This is the crease brush. Nice and fat. Comes to a handy dandy point. |
 |
| This is the "large eyeshadow brush" I like that it's a little bit bulky, but also has a flat edge. |
Using the crease brush I apply black shadow starting at the outside corner and moving up and into the crease of the lid and lifting the brush as I get to the center. I repeat this several times. If you are trying to find the shape of your eye, practice with a medium brown and then go over it with black once you find the right spot. Note: it's higher than you think!
 |
| After adding the black. |
Tip: to keep from getting loose black shadow on the rest of your face use your free hand to hold a square of toilet paper or tissue underneath your eye. This will catch any loose shadow and save cleanup. If you do get loose black shadow on your face do not try to wipe it away with your fingers! Use a large brush to sweep it away gently.
Next I use the large shadow brush to add more black just beneath my eye. It's ok to make it a little messy.
 |
| This is why the flat edge of the large shadow brush is great! |
 |
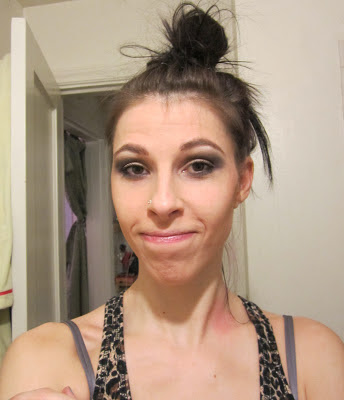
| All done! This is basically my "go-to" makeup look. Takes me about 10 minutes from start to finish. |
If you do choose to add color, I like to do it as a highlight just under the crease or in the very corner of the eye. And don't worry if you make mistakes. It's ok for this makeup to look a little bit smudgey. It is a smokey eye after all.
So that's it! Next is getting dressed :)
No comments:
Post a Comment