Showing posts with label inexpensive. Show all posts

Tuesday, September 24, 2013

DIY Decorated Translucent Bag

Translucent bags are fun. I've been seeing them and wanting one of my own for a while now, haven't you? Here are a couple cute examples of some transparent bags :
Buy this Here

Buy this here
I must admit though, I was a little hesitant to have all my junk out there for everyone to see. 

From I Hate Blonde's Blog
I knew I wanted to get a clear bag, but I also wanted to spice it up a little bit. So how could I get the best of both worlds: a cute clear bag, and not to have everything in my purse showing? I came up with a plan:

From NastyGal's Fall lookbook
Stickers! Luckily for me, my boyfriend collects them. So as someone who likes to work on a budget my first stop was Value Village. I found a bag that was only partially transparent-perfect! And it was only $2.99.


Yes it's Mary Kay. Yes I cut this tag off immediately.

The first thing you'll need are some stickers. 


Next, stuff your bag with something so it has a shape. I put a pillow in mine.


Then start sticking! Don't be afraid to overlap stickers, or cut them up to change the shape. 


Last but not least, dress up and fill your bag with cute stuff. I really like keeping a scarf in the bag, then it's easy to disguise things. It's also great if you have a cute wallet or a few extra little pouches/pockets that you keep in your purse anyway.


Leather jacket- June, Nordstrom Rack
Fringe shirt- H&M
Hooded zip sweatshirt- Ross
High-rise studded shorts- Forever 21
Nylons with back seam- Nordstrom Rack
Leather boots- Steve Madden, Nordstrom Rack
Beanie-H&M
Skull scarf-Ross
"SEX" earrings- Love Culture (originally said sexy but one was missing a 'Y' so I edited them)
Gold chain- Forever 21
Gold rings-various

Thanks for reading! XOxo

Tuesday, June 4, 2013

DIY Studded/Spiked Armbrace Legbrace, or Garter

I have had a few inquiries about the leg garters I've created and I promised this post a while ago, so I'm sorry for the wait!

Anyway, as many of you are aware I am a huge fan of accessories. I love finding new ways to wear things, and I truly believe that accessories can make or break an outfit. Shoes, jewelry, clutches, hairbows and headbands, makeup, I go nuts for the stuff. Maybe because (with the exception of purses and shoes) accessories are usually cheaper than clothes-thus it's easier to justify the purchase. Or maybe because accessories are amazing.

Naturally when I discovered that girls were making decorative garters and "leg braces" I was excited to get on board. The first pieces I came across are selling on Etsy for about $40 each. If you want to buy one, go check out Fox and Owl. They probably didn't pioneer the idea, but they're doing the best at it that I know of. But I didn't want to pay $40 for mine. If I were making them, I would probably sell them for close to that because that's how business works, but to me making them looked like more fun.
I started by making a few studded garters. Then I decided to try making one for my arm.

This post will show you how to make an arm "brace." I'm putting brace in quotations because it doesn't actually function anything like a brace. Maybe I'll come up with a more creative name later, or you can feel free to leave suggestions for me! After you look through this tutorial you will be armed with all the information to make a garter for your leg, or a brace for your arm, or something even cooler!

What You'll Need:

  • Black Elastic (or whatever color you like)
  • Pyramid studs, or spikes, or both (I buy mine here. They ship from Seattle so it's really fast. You can buy cheaper from Amazon, if you have time to wait until they come from China.)
  • A needle and thread, or a sewing machine.
  • Scissors
  • Pins (if you can't do it without them)
What to Do:
  • Take a piece of elastic and measure around the area you want to decorate. Make it a little snug. 

  • Sew the elastic into a nice circle. 

  • Trim the elastic down so there is a minimal overlap. If you're only making a garter all you have to do now is decorate it!

  • Repeat this process with another piece of elastic that is measured to fit the area nearby. 
  • Measure the distance in between. Cut a third piece and pin the pieces together so they don't move while you're sewing.  Attach the connecting piece on the inside so you don't have edges showing.


  • Add spikes and studs as you like them. I like to place them strategically to cover any visible stitches. 
Screw on spikes are very easy to add. Just pierce or cut a small hole, and slide the screw through. Then screw on the spike!

Pyramid studs stab right through the elastic. No need to make a hole first. 

I use pliers to bend the pyramid spikes nice and snug with the elastic. Make sure they are tight!

  • That's it you're done! Wear it proudly! But be careful if you used spikes ;)


Double-wrapped version and single studded garter.
If you'd like to do something different, try substituting cute buttons or beads for spikes or studs. You could also use fabric and velcro or snaps instead of elastic. I just use elastic because it's the easiest to fit.


Thanks for reading! 
XoXO


Friday, April 5, 2013

Date Night Outfit for Dinner and Wine

Every once in a while it is fun to let someone else pick your outfit. It can really help to be creative in a new way. Tonight my boyfriend made dinner reservations. While I was focused on my hair and makeup (trimmed my bangs myself!) I jokingly asked him to pick my outfit.

When I came out there were 4 different dress options laid across the bed and several pairs of shoes in a row on the floor. He said that he was most partial the the "green zebra dress" so I said I'd wear it. The thigh high socks he picked weren't working with it, and neither were his shoe selections so I chose the rest.

Dinner was Italian, and delicious. First time having Tiramisu.
Dress with pockets: Ross
Kitty!
Jacket: Nordstrom Rack


Details:

Left hand:
Kenneth Cole ring on index finger
Middle: chain rings from Forever 21

Right hand:
Skeleton hand ring from Hot Topic

Earrings: Prabal Gurung for Target
Necklace: Tiffany & Co. (gift)

Shoes: Ross
Dobby Tights: Nordstrom Rack

Tied the dress in the front instead of the back because I didn't want a lump in the back of the jacket.
Cheers! Xoxo
Thanks for reading.


Wednesday, March 13, 2013

Rocking in the Mist- a Photoshoot

Inspiration:
The inspiration for this shoot was not from a single image, but more a mixture of concepts. The main two being an abundance of flowing fabric, soft blue and greens for pops of color, and a mohawk. You may have already seen my previous post about how I did the hairstyle. Here are the images. The last one was just the photographer and I letting our creativity lead us to a new place.

Expression:

Silhouette + mohawk =


Body-con dress + belt + sheer black curtain & dyed blue mesh =


Dark purple lipstick + blue & green eyeshadow (on lips) =


Target clearance maxidress + Forever 21 body chain =


Black corset + belt+ black briefs + sheer white curtain =


Jeffrey Campbell shoes + attitude =


All photos courtesy of Kaylyn Beauprey. Tattoo by Stephen Lee.

Thanks for reading!
XOXO

Friday, December 14, 2012

What I Love Today: Sheer Lipstick

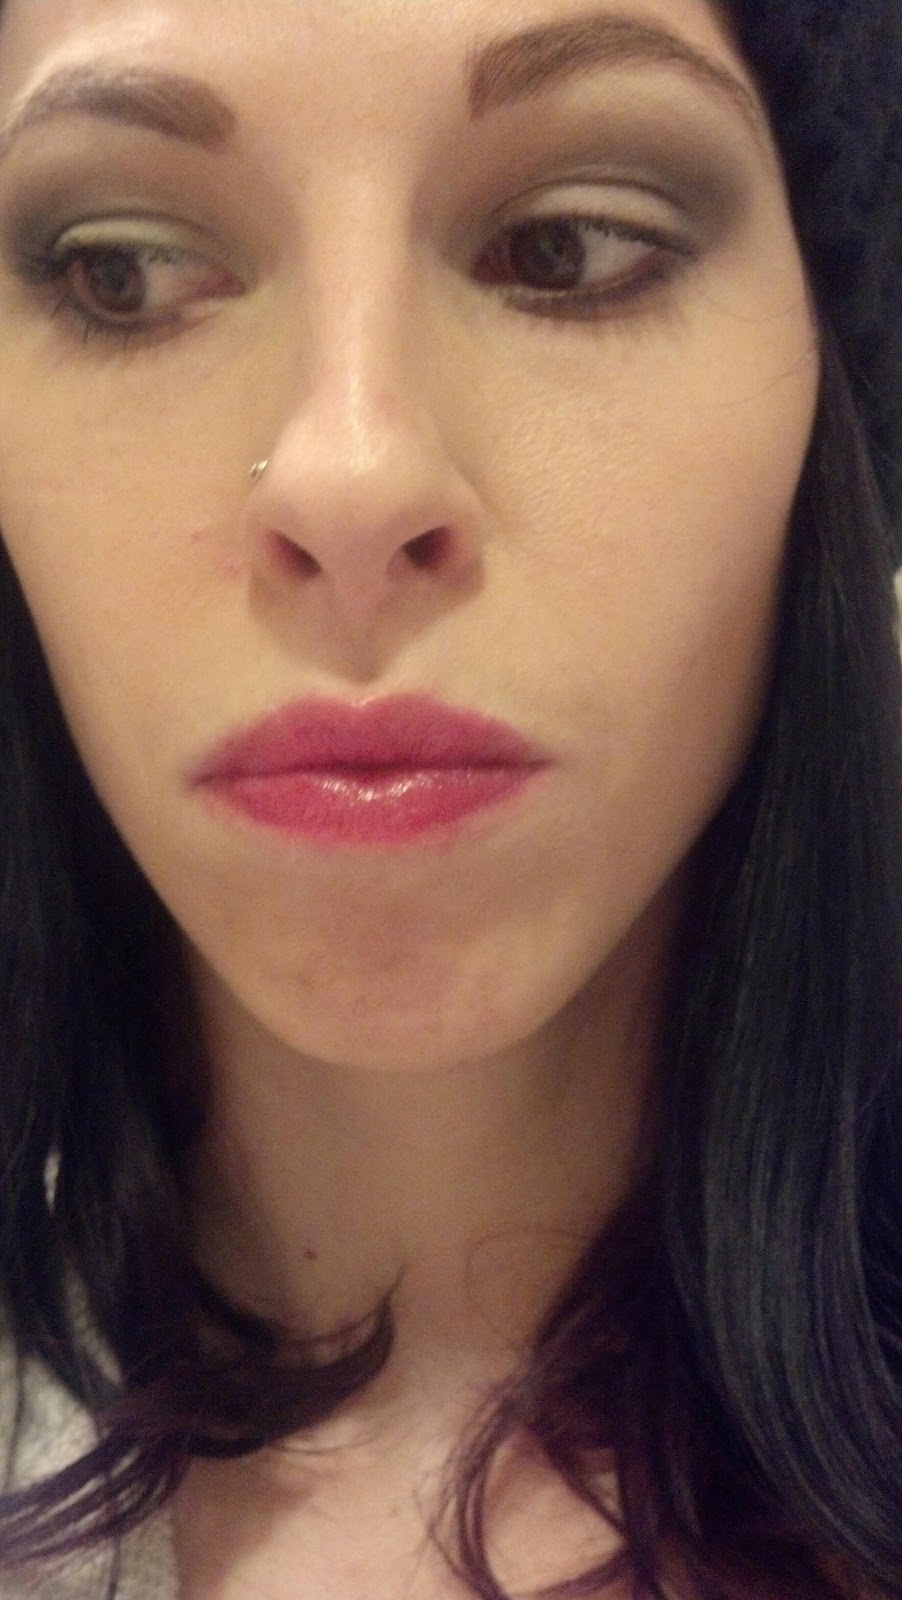
Recently I have discovered a product that I feel the need to tell everyone about: L'oreal Paris' Colour Riche Caresse lipstick. You have probably seen the advertisements. I know I did, that's why I decided to buy it in the first place. I was hoping it would be exactly like the ad, and I know it sounds crazy but I would say it actually is! Even though it is technically a lipstick, the color is so sheer, it is more like a tinted gloss. A tinted gloss that somehow isn't sticky, doesn't get clumps of color, and isn't too shiny. It looks very close to natural. It is exactly what I've been looking for. Here are some of the reasons why:
* I have a large mouth. Big lips. This makes it difficult to wear lipstick (especially in bright colors-which I love) without looking ridiculous.
* Lipstick is a very strong statement look. It can be a bit daunting! Think about it... how many people do you know that wear lipstick on a daily basis?  Heavy lipstick has a time and place.
* I like to wear color on my lips to even them out, and hide imperfections.
* A little color on the lips draws attention to them.
*I typically wear a lot of eye makeup. It is hard to wear a heavy eye with a colored lip without looking like a streetwalker or a drag queen. Not that there is anything wrong with hooker chic or being a queen, but once again, it has a time and a place ;)

So far I have bought two colors: #176 Sunset Angora, which is a subtle pink color and #179 Cherry Tulle which is a dark/bright red. I hope these pictures give you a good idea of why I love it!
These are my naked lips 

On the left is Covergirl's 400 "Temptress" compared to the Sunset Angora.
Pretty similar shades of pink. 
This is the difference between the pinks.
You can see how sheer the L'Oreal is by comparison. 
Wearing the Sunset Angora. 

A similar shade of red. The black tube is Wet N' Wild #911D Stoplight Red.
The other is the Cherry Tulle from L'Oreal 

Comparison between the red shades. Once again, so sheer!  
Wearing the Cherry Tulle.