Showing posts with label value. Show all posts

Wednesday, May 15, 2013

Girl At The Rock Show- Eagles and Aliens at El Corazon

It was a Friday. My boyfriend and I went to Seattle to see Eagles and Aliens play. El Corazon was the venue. Vintage was the look. 

Eagles and Aliens were excellent, even though it was their first show playing as a three piece. I was excited to take home their CD which hasn't left my car stereo yet, even though it only has 3 tracks. Seattle's reputation for music acts like Nirvana and Pearl Jam give every local band an ego boost, so it was nice to see a group that was not only good, but actually in it for the music. Raw passion was exuded throughout their set and spread like a contagious virus. Very inspiring. 


My terrible fan girl photo of the band.

I love collage. Reminds me of getting dressed. Combination of independent pieces to create something else.  My favorite art form.
Turn the lights down low. Let's do this.

El Corazon's wonderful logo.
Matte Black with chrome accents. Like leather and chains. Sexy at night. 
On the way to the venue. My first attempt at victory rolls. I'll try again and post when I perfect  it ;)
A padlock as an accessory. Superdig!
The 3D collage by the entrance. 
Love this. Great front and back shirt idea, huh?
Just a reminder: step up or you'll trip. 
The complete look. 

About the Look:
shoes: Jeffrey Campbell Pointe MC-Karmaloop
skirt: Wilsons Leather-Value Village (less than $10!)
croptop: Ross

Monday, April 8, 2013

DIY Flower Crown- a Creative Guide

I love spring. Mostly because that means it's almost summer.
The best thing about spring besides the weather is the beautiful flowers. And what's the best thing to do with something lovely? Wear it, of course!
Here's a guide to making your own fun floral headwear.

What You'll Need:

  • Fake flowers
  • A headband, if possible matched to your haircolor
  • Glue gun
  • Scissors
  • Needle nose pliers 
  • Cute fabric (optional)
  • Beads or gems (optional)
What To Do:

There are a lot of options with this project, so let this serve as more of a guide than an a step by step how-to. Be creative!


Start with a pile of flowers.  I selected a variety, but all in the same color family. More colors could be fun too. These are mostly roses, with some lilies and smaller bright wildflowers thrown in. All of these flowers are from the dollar store. 

Good luck keeping kitty out of them
Get your headband all ready to go. I used a headband that I don't wear anymore. It had some jewels attached to it so I removed them. 

My old headband
Now it's time to fire up the glue gun. While it's warming up. Pull the flowers off their stems. Using the scissors, trim the bottom of the flowers. Try to make them as flat as possible by trimming close to the petals. If you like, set aside some leaves.

Trim the green plastic down to make it flat, but don't cut it all away or the flower will fall apart.

Not all the flowers can be flat on the bottom, but still trim the plastic down as much as you can.
You can modify the flowers before adding them to the headband if you like. This is when you would use gems or beads to add to the flowers.

Using the hot glue gun, I attached some of the jewels from the headband inside the flowers.
I also glued some of the smaller flowers inside the large ones.
This is when you can use fabric also if you like.

Pick a cute fabric, and try to get it away from your kitten
I made a bow with a large piece of the fabric and some hot glue
Small squares of fabric can be made into little flowers by putting a dot of glue in the center,
pinching the glue with the pliers (so you don't get burned) and twisting the fabric.
Start on one side of the headband, and attach pieces using the hot glue. Use pliers for some things so you don't get burned!

If you made a bow, attach it to one side of the headband, if not just start with a flower

Keep adding flowers. Be sure to fit them close to each other so there aren't any gaps.

You can add leaves too, but make sure not to neglect the back side of the headband. 
The finished piece at my best friend's bridal shower!

Tea party. Everyone wore hats. I won for "most beautiful" hat.
 I made a second one as well to wear for a more casual event or even an every day outfit. This one is just flowers and leaves on a black band. 

From the front. Some fabric flowers in this one too!
The back view. Lots of leaves!
What it looks like on.
I hope you enjoyed this post. Have fun and be creative making your own flower crown! 
Thanks for reading!
Xoxo


Friday, April 5, 2013

Date Night Outfit for Dinner and Wine

Every once in a while it is fun to let someone else pick your outfit. It can really help to be creative in a new way. Tonight my boyfriend made dinner reservations. While I was focused on my hair and makeup (trimmed my bangs myself!) I jokingly asked him to pick my outfit.

When I came out there were 4 different dress options laid across the bed and several pairs of shoes in a row on the floor. He said that he was most partial the the "green zebra dress" so I said I'd wear it. The thigh high socks he picked weren't working with it, and neither were his shoe selections so I chose the rest.

Dinner was Italian, and delicious. First time having Tiramisu.
Dress with pockets: Ross
Kitty!
Jacket: Nordstrom Rack


Details:

Left hand:
Kenneth Cole ring on index finger
Middle: chain rings from Forever 21

Right hand:
Skeleton hand ring from Hot Topic

Earrings: Prabal Gurung for Target
Necklace: Tiffany & Co. (gift)

Shoes: Ross
Dobby Tights: Nordstrom Rack

Tied the dress in the front instead of the back because I didn't want a lump in the back of the jacket.
Cheers! Xoxo
Thanks for reading.


Friday, December 14, 2012

What I Love Today: Sheer Lipstick

Recently I have discovered a product that I feel the need to tell everyone about: L'oreal Paris' Colour Riche Caresse lipstick. You have probably seen the advertisements. I know I did, that's why I decided to buy it in the first place. I was hoping it would be exactly like the ad, and I know it sounds crazy but I would say it actually is! Even though it is technically a lipstick, the color is so sheer, it is more like a tinted gloss. A tinted gloss that somehow isn't sticky, doesn't get clumps of color, and isn't too shiny. It looks very close to natural. It is exactly what I've been looking for. Here are some of the reasons why:
* I have a large mouth. Big lips. This makes it difficult to wear lipstick (especially in bright colors-which I love) without looking ridiculous.
* Lipstick is a very strong statement look. It can be a bit daunting! Think about it... how many people do you know that wear lipstick on a daily basis?  Heavy lipstick has a time and place.
* I like to wear color on my lips to even them out, and hide imperfections.
* A little color on the lips draws attention to them.
*I typically wear a lot of eye makeup. It is hard to wear a heavy eye with a colored lip without looking like a streetwalker or a drag queen. Not that there is anything wrong with hooker chic or being a queen, but once again, it has a time and a place ;)

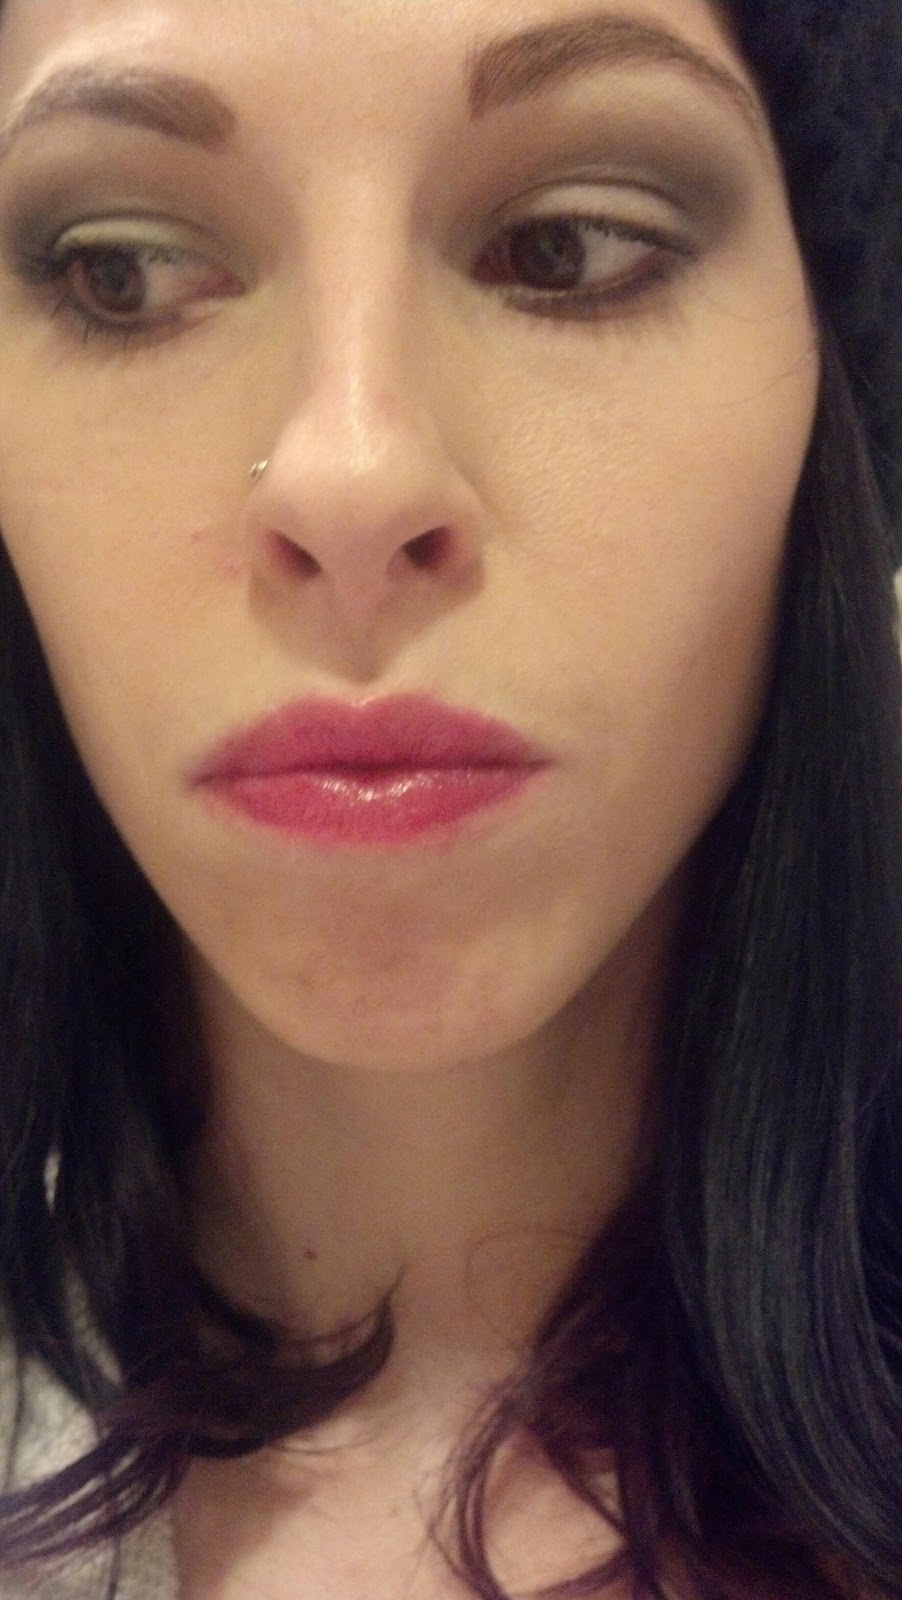
So far I have bought two colors: #176 Sunset Angora, which is a subtle pink color and #179 Cherry Tulle which is a dark/bright red. I hope these pictures give you a good idea of why I love it!
These are my naked lips 

On the left is Covergirl's 400 "Temptress" compared to the Sunset Angora.
Pretty similar shades of pink. 
This is the difference between the pinks.
You can see how sheer the L'Oreal is by comparison. 
Wearing the Sunset Angora. 

A similar shade of red. The black tube is Wet N' Wild #911D Stoplight Red.
The other is the Cherry Tulle from L'Oreal 

Comparison between the red shades. Once again, so sheer!  
Wearing the Cherry Tulle.